What will this help with?
Valuable insights on Domain reputation and health
Detailed insights on IP reputation, spam rate, and % of emails authenticated
Dependence - The tech team/whoever manages your domains
What is domain reputation?
Domain reputation is the overall health of your domain. Think of domain reputation as your credit score. If you have a good credit score, the banks see you as a valuable customer. Similarly, if you have a good domain reputation, it will signal to ISPs that your emails are relevant and valuable.
You can measure domain health with tools like Google Postmaster, which tracks data on your domain health, spam reports, etc.
How to set up Google Postmaster?
You need a Google account to proceed. If you don’t have one, start by creating an account. Visit postmaster.google.com and log in with your Gmail account.
Enter your authentication domain name in the popup that appears next.
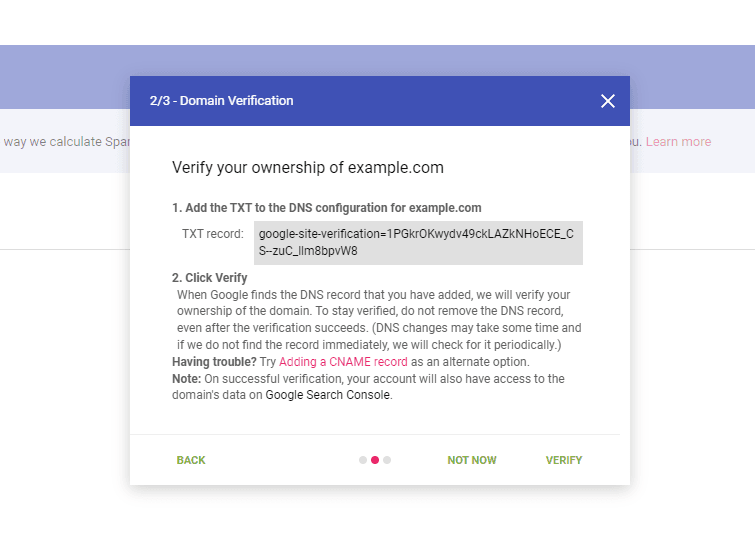
Google Postmaster will generate a TXT record. Copy it and add it to your DNS configuration of the entered domain. You can ask your tech team for help if you don't have access to the domain records.

You can add a CNAME record as an alternate option if you’re having trouble with the TXT record.
You’ve to verify the ownership after you’re done adding the record. You can do this by clicking “Verify” in the popup, which will show you a success message
After verification, wait until Postmaster collects the required data.
You can explore the tools it offers and measure your email campaigns.
Visit Google Postmaster and review the data there every week to ensure high domain health.
However, if you are on Mailmodo, this becomes simple. You can check the sender domain health in the email tool itself.
💡 Resources
How to see Google Postmaster data directly in Mailmodo?
Sign in to Postmaster and add your domain by following the steps above.
Click on the ellipsis icon against your domain. Then, click on ‘Manage Users’ and click on the ‘+’ sign in the bottom right corner.
Grant read access to verify@mailmodo.com
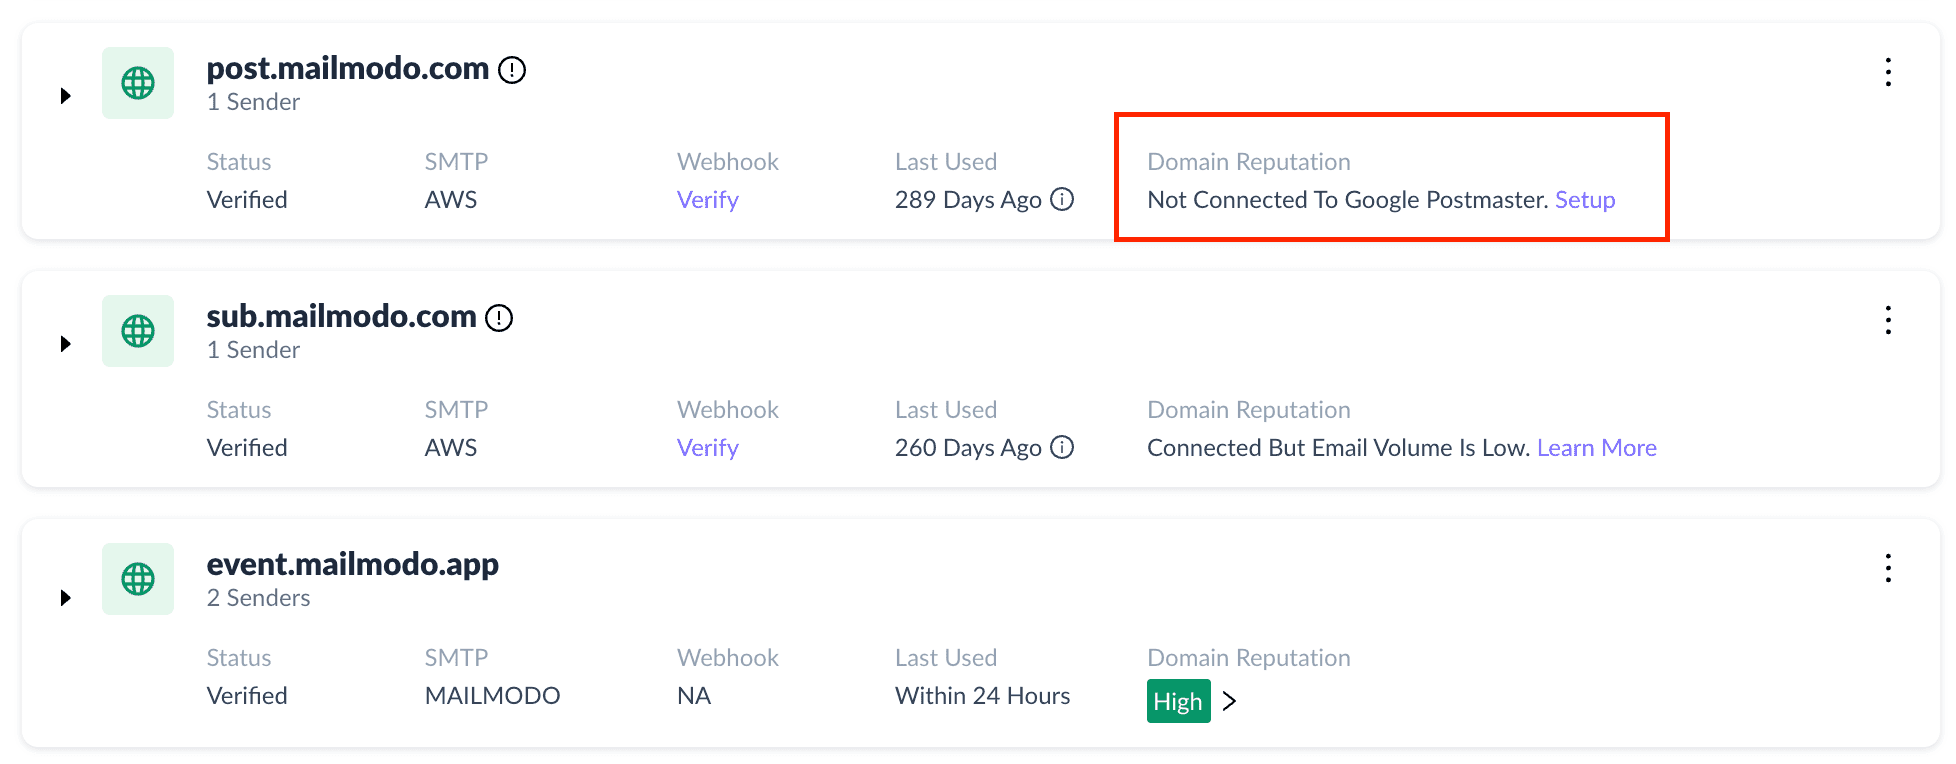
Now head to your Mailmodo account, go to the Setting > Sender settings, and locate your sender domain
Click on ‘Setup’ below your sender domain, as shown in the below image.

On the next window, click on verify.
Once verified, you can check the domain health directly in Mailmodo sender settings, as shown in the above image.
What you should do next
Hey there, thanks for reading till the end. What now?
Complete the task with Mailmodo Take action and complete the task to improve your email performance using Mailmodo. Try it for free for 21 days.
Join the challenge If you want to get daily emails with actionable tasks with step-by-step instructions to stay motivated to improve your email performance then register for the the challenge here.
Need some help? If you have any questions about the task, ask us on our Slack community and get answers from experts. Join the community here.
Get 3X email conversion
with Mailmodo

Create & send interactive emails without coding

Put revenue on auto-pilot with pre-built journeys

Save time with AI-powered email content creation
Experience world’s only interactive email marketing platform
Trusted by 10000+ brands


