We all know how easily email inboxes can become a chaotic mess. Without proper management, crucial emails from key contacts can easily slip through the cracks. This risk is even greater for businesses that handle a high volume of important communications. Missing out on emails from other companies, potential deals, or customer inquiries, feedback, and questions can have significant consequences.
A simple solution to this dilemma is email forwarding. In this guide, we'll explore the concept of email forwarding, understand how it functions, discuss its benefits, and walk you through the steps to set it up effectively.
What is email forwarding?
Email forwarding allows you to reroute incoming emails from one address to another automatically. This feature can be useful for various purposes, including simplifying email management by gathering all your important messages in one primary inbox, ensuring you don't miss any important communications. It's a great time-saver and helps keep your email interactions streamlined and organized.
How does email forwarding work?
Email forwarding works using email servers to redirect/forward messages to a different address. When configuring email forwarding, you identify a primary email address (the source) from which emails are to be sent and a destination address (the target) where these emails should end up. The server transfers incoming emails from the source to the target address, ensuring they reach their new destination quickly and efficiently.
Key uses of email forwarding in your business
As stated before, email forwarding can be useful for various use cases. Let’s take a look at how it can be used in your business:
- Streamlining inbox management: Email forwarding streamlines inbox management by consolidating all important incoming messages into one primary inbox. This simplifies email access, reduces the need to juggle multiple email accounts, and improves overall efficiency.
- Improving customer response: In customer service, email forwarding boosts responsiveness to customer inquiries by directing communications to specialized inboxes. This targeted approach ensures customer interactions are delivered to the right teams and handled promptly and effectively, improving customer satisfaction.
- Integrating communications with CRM: Integrating email forwarding with customer relationship management (CRM) systems automates the transfer of customer emails directly into the CRM. This integration helps you track and manage customer interactions more effectively without manual input. The result is improved data accuracy, responsiveness, efficient lead management, and customer tracking.
- Integration with marketing software and automation: Email forwarding can seamlessly integrate with marketing software and automation platforms. You can streamline your marketing operations by channeling marketing-related emails to specific teams or systems. This enables more efficient campaign management, precise marketing metrics tracking, and effective targeting in communications with your audience.
How to set up email forwarding
Before we begin, you must know that email forwarding is usually set up if you want your emails to get forwarded continually. If it’s just a message you want to forward to a single address, you might do it manually by following the general steps below. It should be the same for all email clients:
- Open the email that you want to forward
- Click on the forward button
- Enter the recipient’s email address in the ‘To’ field
- If you want to send a copy or a blind copy of the email to someone, fill in their email addresses in the ‘cc’ and ‘bcc’ fields, respectively
- If you want to add any additional email messages, add them in the body of the email
- Click send.
Now, let’s set up automatic forwarding. We’ve covered two major email clients so you can jump to the most relevant one.
Automatic email forwarding in Microsoft Outlook
Step 1: Click the Settings gear icon on the web toolbar in your inbox.
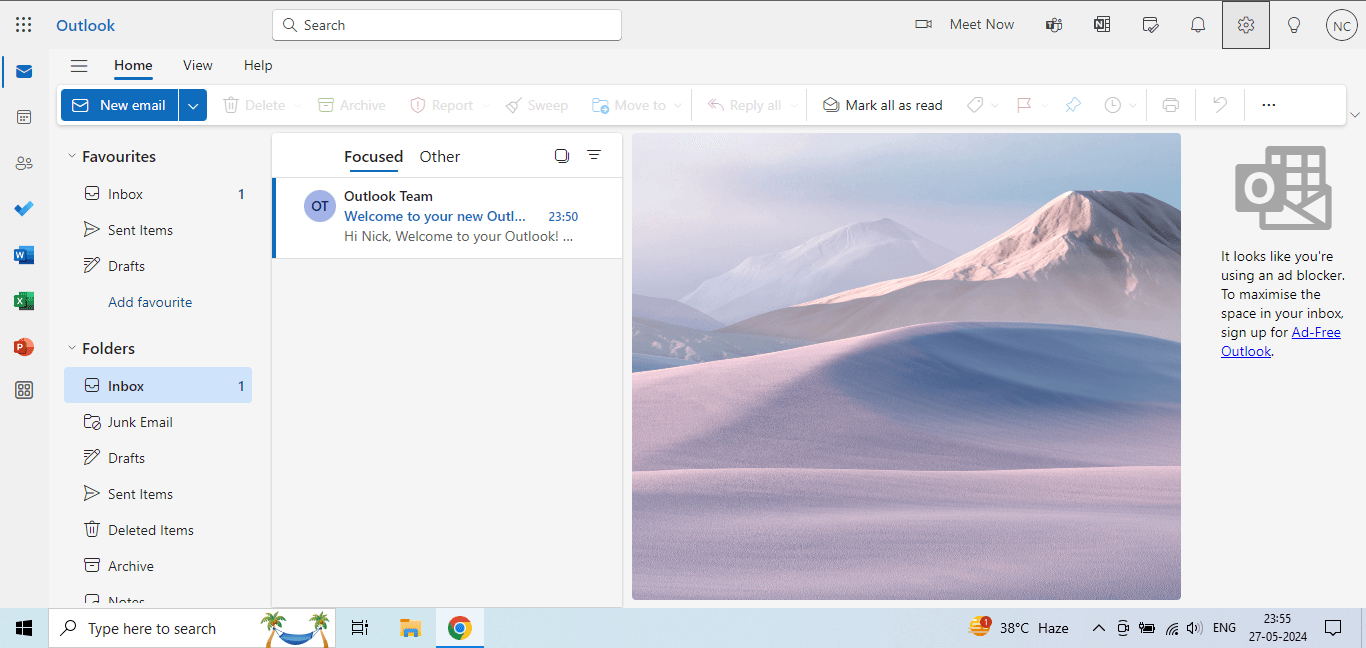
Step 2: From there, navigate to "View all Outlook settings."
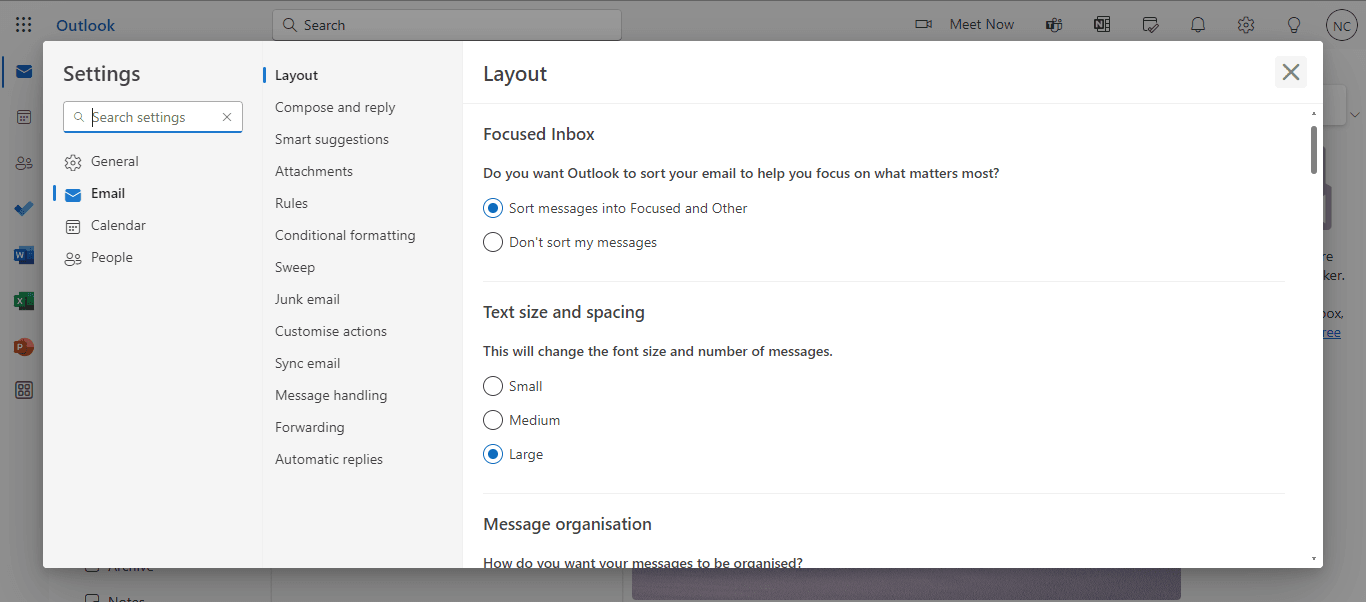
Step 3: Go to Mail and select the Forwarding tab in the settings menu. Check the "Enable forwarding" box to activate email forwarding.
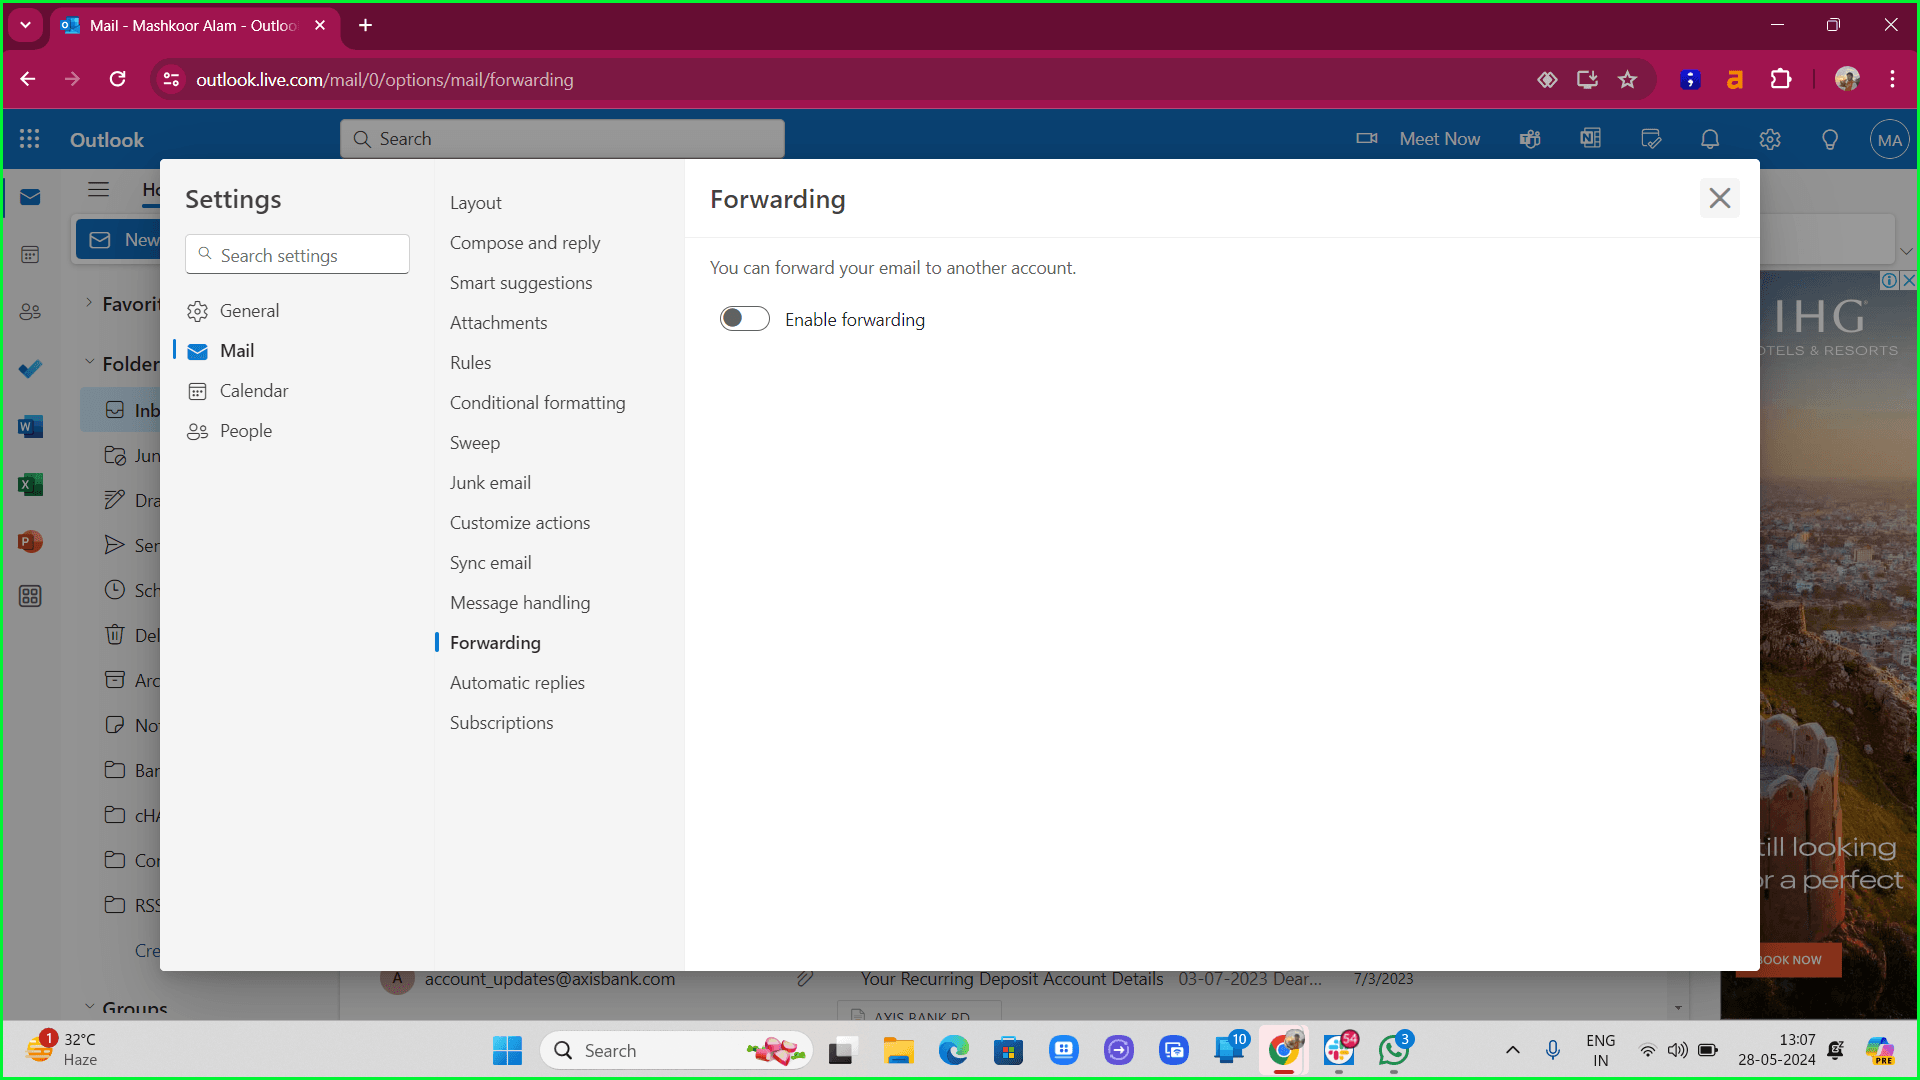
Note: If you ever need to stop forwarding email, uncheck this box.
Step 4: Input the email address where you want your messages to be forwarded.

Note: If you prefer to keep copies of the forwarded emails, tick the "Keep a copy of forwarded messages" checkbox. Without this option selected, forwarded emails won’t be stored in your Outlook account, not even in the Deleted Items folder.
Step 5: Hit Save to apply your settings.
Forward specific emails based on certain criteria in Outlook
Step 1: You can access the settings through the same path: Settings > View all Outlook settings. Go to Mail, then to Rules, and click "Add a new rule."
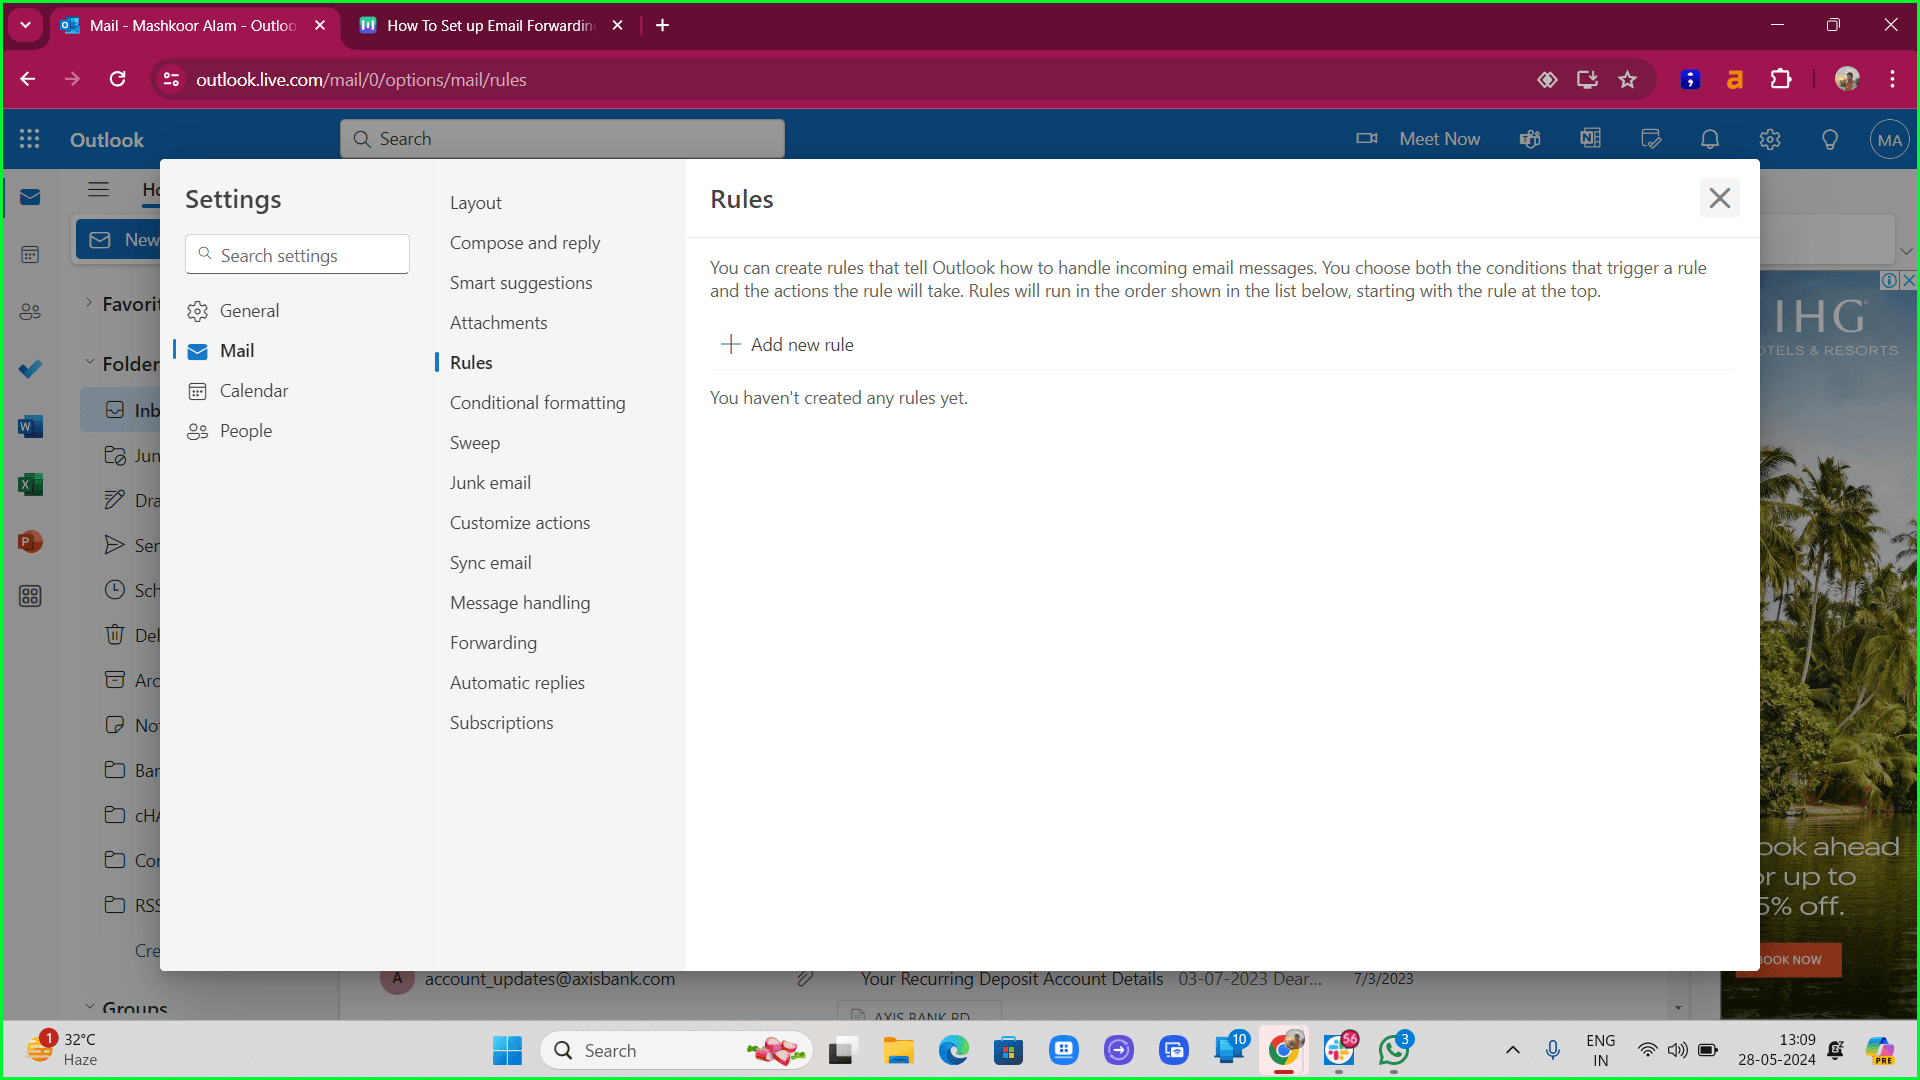
Step 2: Name your rule something descriptive to remind you of its purpose. Under the "Add a condition" dropdown, select the criteria for forwarding your emails, like emails with attachments, emails from specific senders, or emails marked with high importance.
Step 3: Choose how you want the emails forwarded by selecting an option from the "Add an action" dropdown. You can choose to forward emails directly or as attachments.

Step 4: Type in the email addresses where the emails will be sent. If forwarding to multiple recipients, include all relevant addresses.
Step 5: Additionally, you can set exceptions to your forwarding rule by selecting ’Add an exception’ and then choosing the appropriate conditions and options to exclude certain emails from being forwarded.

Step 6: Save your rule to activate it.
Automatic email forwarding in Gmail
Step 1: Clicking the Gmail account's gear icon. This will open up your account tools. Then, choose "See All Settings."

Note that auto-forwarding emails are not available in the Gmail mobile app.
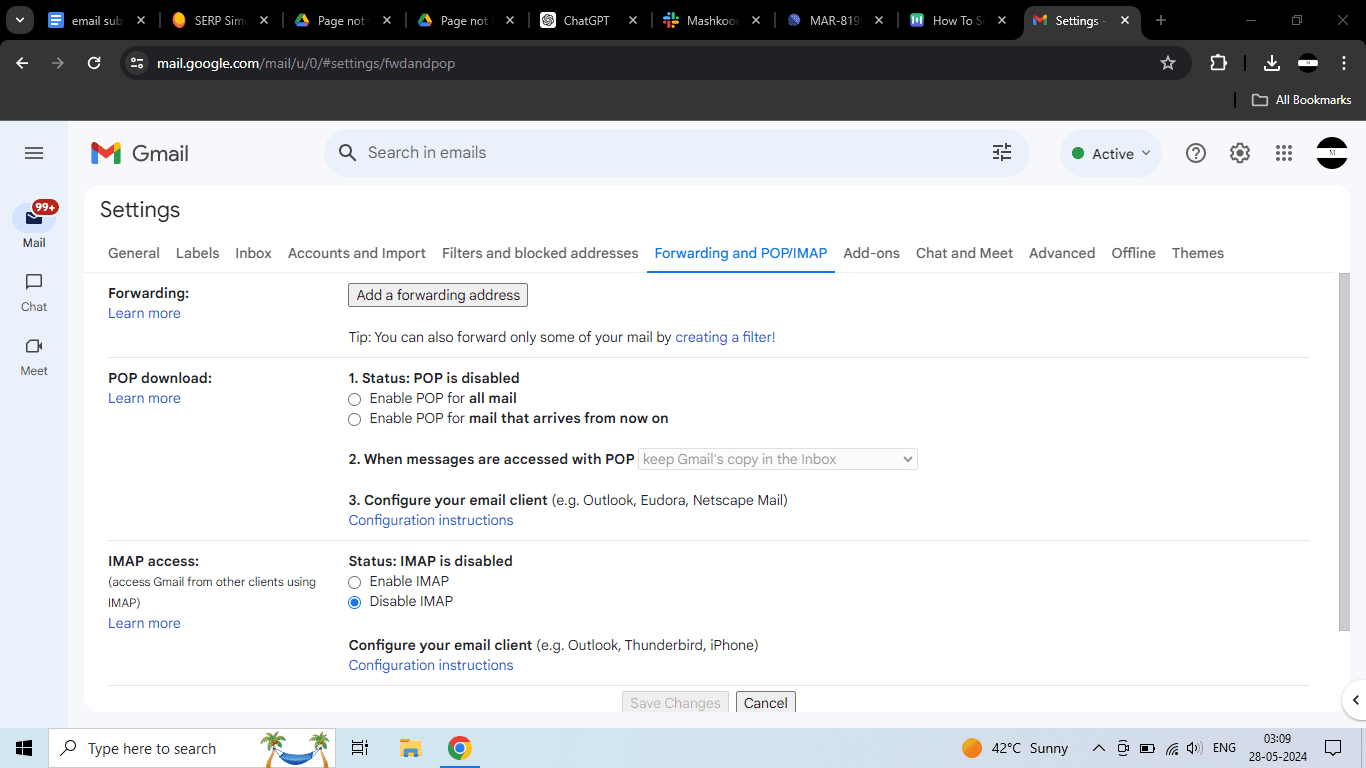
Step 2: Locate and click on the 'Forwarding and POP/IMAP' tab. Select "Forwarding" and then click "Add a Forwarding Address".

Step 3: In the "Forwarding Address" field, type in the email address to which you want your emails forwarded.

Note: Gmail will send a confirmation email to this gmail address to verify permission and ensure security.
Step 4: After verification, set the direction for your emails by clicking “Next,” then “Proceed,” and finally, “OK.”
Step 5: Once your forwarding address is confirmed, navigate to your settings page, refresh, and return to the 'Forwarding and POP/IMAP' tab. Under the forwarding section, select "Forward a copy of incoming emails." You'll then decide whether to forward only or keep a copy in Gmail. Google recommends keeping a copy in Gmail.
Step 6: Once done, click “Save Changes” to apply your forwarding settings.
Here’s another guide on How to Create a Business Email in 2024 to help you make this process even more effective
Best practices
Here are some best practices to help you use email forwarding most efficiently.
- Clearly define rules to direct specific emails to the right addresses, ensuring accurate delivery.
- Regularly review and update your email forwarding settings to align with evolving business needs.
- Establish forwarding rules thoughtfully to avoid creating endless loops of email routing.
- Implement security measures to protect the confidentiality of forwarded emails and ensure compliance with privacy regulations.
Conclusion
In this guide, we've covered all the info on email forwarding that you must follow on two major email clients, Outlook and Gmail. With these steps, you can tidy up your mailbox, respond quicker to clients, and keep your teams in sync. Implementing these techniques will save you time and safeguard your communications. Now that you know how to set up and tweak email forwarding, you can streamline your workflows and boost your business efficiency.


