Does Zendesk have AMP emails?
Zendesk formats your emails in HTML and Plain Text before sending them to your customers. Unfortunately, AMP emails formatting is not yet a reality with Zendesk. So you can’t add forms, carts, widgets, etc., which would’ve made the customer support way easier for you and your customers.
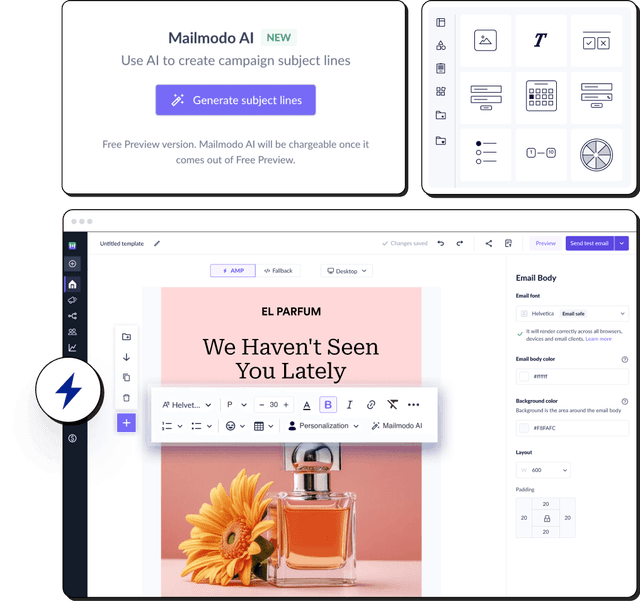
Luckily, we’ve built a super cool Zendesk extension that’ll help you connect both platforms and use Mailmodo’s powerful AMP editor, and build powerful AMP emails. Let’s move on to the exact steps you need to take to integrate both platforms.
Benefits of using Zendesk integration with Mailmodo
Here are some benefits of integrating your Zendesk account with Mailmodo's email marketing platform to send AMP emails:
Building templates in Mailmodo is easy with a simple drag-and-drop email builder that doesn’t require you to have a software engineering degree.
But if you’re short on time and need ready-made templates, you’re in the right hands. Mailmodo also has a catalog of beautiful templates you can choose from and quickly set up your campaign.
Speaking of time, we’ve made the setup process as short as possible, so you can quickly set it up and move on with creating a campaign.
We also keep coming up with exciting components like spin the wheel, which you can add to your emails and leave a lasting impression on your customers.
How to send AMP emails from Zendesk using Mailmodo
Here are the exact steps you need to take seamlessly connect Mailmodo and Zendesk:
Creating a transactional campaign in Mailmodo
- Navigate to the Templates category. Click on Create New Template.

- Create a template using the editor. Upon completion, save and rename the template.

- Navigate to Transactional from the vertical menu on the left.

- Create a new transactional campaign. Select the template you saved before. Click on Next.

- Add details like campaign name, subject line, pre-header text, from name and reply to email. Click on Next.

- Select webhook as the external trigger. Click on Next.

- Review and send test campaign. Once done, click on Enable Campaign.

- Copy the webhook URL generated on the trigger info page.

Zendesk Setup
Creating a webhook in Zendesk
- Navigate to Admin from the Zendesk dashboard.

Go to Admin Center.

- Navigate to Apps and Integrations from the Admin Center dashboard. Select webhooks from the list.

- Go to Actions>Create Webhook.

- Name the webhook. Paste the webhook URL (in the Endpoint URL field) copied from Mailmodo's trigger info section.


- Select Request method as POST. Select Request format as JSON. Select None under Authentication.

Click on Test webhook. Select Test event source as Custom test. Paste the following in the Request JSON Body.
{
"email": "john@example.com",
"data": {}
}

Replace john@example.com with the email id on which you want to receive the test email.
Click on Send test.
You should receive 200 OK as the response. This means your webhook is working.

Check your inbox to view the test email sent from Mailmodo.
- Once you have successfully tested your webhook, click on Create.

Click on Complete setup. Select leave without connecting when a modal opens.

You would be able to see the webhook status as active.

You have successfully created a webhook. Now, connect your webhook to a trigger or automation for it to work.
Creating a trigger or automation in Zendesk
- Go to Object and Rules from the admin dashboard on the left. Navigate to Business rules. Click on triggers or automation depending on your use case.
Note: For this tutorial, we are going to create a Trigger. Automations can be created in a similar manner. Your webhook can be connected to a trigger as well as automation.

- Click on Add trigger.

Name the trigger, and give an appropriate description. Select a pre-existing category or create a new category.

- Configure the trigger conditions.

- Under Actions, click on Type or select actions.
 Select Action as Notify active webhook

Select the webhook you created before.

Upon selecting the webhook, you will see the webhook details.

- Paste this in the JSON body.
{
"email": "",
"data": {
"First Name": ""
}
}
Map email and first_name to the corresponding attributes in Zendesk, as shown below. You can add other parameters in the data key.
Copy the attribute value from the View available placeholders. Paste the value in the JSON body.

Once the webhook body is configured, click on Create. Your trigger is successfully saved.
Navigate back to Apps and Integrations>Webhooks. The webhook status would be active.

Click on the three dots beside the webhook name. Click on view details.

Navigate to Event Subscription. Your trigger should be visible here.

You have successfully created a trigger campaign. Every time the trigger event occurs, an email will be sent to the corresponding contact.
Wrap up
Zendesk is good enough to send basic email notifications. But if you want to add interactive forms, widgets, quizzes, carts, polls, and surveys and take your customers’ feedback right inside their inboxes, Zendesk can’t help you alone. But Mailmodo can.
Besides, if you’re curious about what other benefits AMP emails have to offer, check out AMP email advantages and benefits but just a disclaimer — You can’t help but switch to AMP emails after seeing the amazing benefits it has to offer.
What you should do next
Hey there, thanks for reading till the end. Here are 3 ways we can help you grow your business:
Talk to an email expert. Need someone to take your email marketing to the next level? Mailmodo’s experts are here for you. Schedule a 30-minute email consultation. Don’t worry, it’s on the house. Book a meet here.
Send emails that bring higher conversions. Mailmodo is an ESP that helps you to create and send app-like interactive emails with forms, carts, calendars, games, and other widgets for higher conversions. Get started for free.
Get smarter with our email resources. Explore all our knowledge base here and learn about email marketing, marketing strategies, best practices, growth hacks, case studies, templates, and more. Access guides here.